


When you choose full arch dental implants, you see a new smile taking shape. Behind the scenes, your dentist builds a detailed plan that guides every step, from surgery to your final teeth.
Full arch dental implant treatment planning is done after studying your oral health, capturing digital scans and 3D images, mapping ideal implant positions, and designing a custom prosthesis that fits your bite and facial structure.
They review bone levels, gum health, and your medical history to confirm that implants will succeed. They also plan how your temporary and final teeth will look and function before any surgery begins.
Digital tools now shape much of this process. Many practices use virtual planning and guided surgery, similar to the workflow described in this overview of full-arch implant rehabilitation with virtual planning.
This approach helps your dentist place implants with precision and deliver a secure set of teeth that supports healing and long-term comfort.
Key Takeaways
- Your dentist evaluates your health, bone, and bite before planning implants.
- Digital scans and 3D imaging guide precise implant placement.
- A custom temporary and final prosthesis support healing and long-term function.
Table of Content
- Diagnostic Assessment and Patient Selection
- Advanced Imaging and Digital Data Acquisition
- Treatment Planning and Prosthetic Design
- Guided Surgery and Modern Implant Placement Approaches
- Provisionalization, Immediate Loading, and Long-Term Success
- Frequently Asked Questions
Diagnostic Assessment and Patient Selection
Before you place a single implant, you study the teeth, bone, and soft tissue in detail. You also look at health history, risk factors, and what the patient expects from full-arch implantology.
Evaluating Terminal Dentition
When a patient has terminal dentition, you decide if the remaining teeth can last or if removal will give a better long‑term result. You check mobility, bone loss, decay, root fractures, and failed crowns or bridges.
You review radiographs and often use CBCT to measure bone and detect infection. You also test bite stability and vertical dimension. If the bite has collapsed, you plan how to restore it before or during implant treatment.
Key factors you assess:
- Advanced periodontal disease
- Repeated endodontic failures
- Severe wear with loss of vertical dimension
- Non-restorable caries
- Poor crown-to-root ratio
You also review medical history and smoking status. Careful diagnosis and treatment planning form the base of successful implant dentistry.
If saving the teeth will lead to repeated repairs, you may recommend full-arch implantology instead of patchwork dentistry.
Understanding Edentulous Arches
When you treat an edentulous arch, you focus on bone shape, ridge width, and soft tissue thickness. The maxilla often presents more limits than the mandible due to sinus position and bone density.
You measure restorative space from the crest of bone to the opposing arch. Different prosthesis types require different vertical space:
| Prosthesis Type | Minimum Vertical Space |
| FP-1 | 7–12 mm |
| FP-2 / FP-3 | ≥ 12 mm |
| RP-4 | ≥ 15 mm |
| RP-5 | 8–9 mm |
You also decide between fixed and removable designs using systems such as Misch’s classification.
In full-arch implantology, you plan implant number, angulation, and need for bone reduction before surgery. Digital scans and CBCT help you match implant position to the planned teeth, not just the available bone.
Setting Patient Expectations
You must set clear expectations early. Patients often focus on “fixed teeth,” but you explain healing time, costs, and hygiene needs.
Discuss:
- Treatment phases (surgery, interim prosthesis, final prosthesis)
- Possible bone grafting
- Immediate vs delayed loading
- Maintenance visits and daily cleaning
If you plan immediate loading, you explain that success depends on primary stability and even implant distribution.
Many clinicians follow structured full-arch protocols that cover consent, CBCT planning, interim prosthesis design, and maintenance.
You also review long-term responsibilities. Even a fixed full-arch prosthesis requires regular professional care. When patients understand the process and their role, they make informed choices and stay committed to treatment.
Advanced Imaging and Digital Data Acquisition
You cannot plan a full arch case on guesswork. You rely on detailed 3D images and precise digital scans to guide implant position, prosthetic design, and bite control from day one.
CBCT and Cone-Beam Scans for Implant Planning
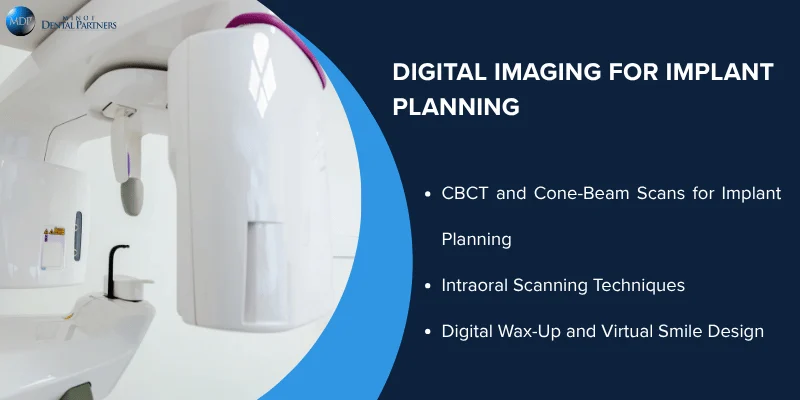
You start with a CBCT scan (cone-beam scan) to see the patient’s bone in three dimensions. Unlike a flat X-ray, CBCT scans show bone height, width, and density at each implant site.
You review key structures such as:
- The inferior alveolar nerve
- The maxillary sinus
- Nasal floor and sinus septa
- Existing root fragments or pathology
With this data, you perform virtual implant planning inside specialized software. You place digital implants in ideal positions based on available bone and future tooth position, not just where bone looks thickest.
You also measure angulation and depth in millimeters. This helps you decide if you need bone grafting, sinus lifts, or angled multi-unit abutments.
CBCT data often merges with intraoral scanning files. When you align both datasets, you plan surgery based on bone and the final prosthetic outcome.
Intraoral Scanning Techniques
After imaging the bone, you capture the teeth and soft tissue using intraoral scanning (IOS). An intraoral scanner creates a digital 3D model of the arch without traditional impression material.
You scan:
- The upper and lower arches
- The bite relationship
- Soft tissue contours
- Any remaining teeth
For full arch implant cases, accuracy matters across long spans.
Modern workflows combine IOS with photogrammetry systems, such as those used in intraoral photogrammetry for full-arch implant precision, to capture implant positions with high precision.
Coded scan bodies and systems like iMetric improve how software reads implant location and angulation. This reduces distortion that can happen in long-arch scans.
You then match the IOS file with the CBCT scan. This creates a single digital model that shows bone, implants, and soft tissue together.
Digital Wax-Up and Virtual Smile Design
Once you gather imaging and scan data, you move to the digital wax-up. This step designs the final teeth before surgery begins.
You build tooth shape, size, and position in software. You adjust:
- Midline
- Smile arc
- Tooth length
- Occlusion and vertical dimension
The digital wax-up drives implant placement. You position implants to support the planned teeth, not the other way around.
Some clinicians also use virtual smile design tools to preview changes in lip support and tooth display. When combined with CBCT and IOS data, this creates a complete digital plan.
The final output guides surgical templates, provisional restorations, and lab fabrication. Every step connects back to the imaging and digital data you captured at the start.
Treatment Planning and Prosthetic Design
You build a full-arch implant treatment plan by deciding what type of restoration the patient needs, mapping implant placement with digital tools, and designing around bone and soft tissue limits.
Every step ties back to how the final implant restoration will look, feel, and function.
Selecting Restoration Types: FP1, FP2, FP3
You start by choosing the right prosthesis type: FP1, FP2, or FP3. This decision shapes the entire treatment plan.
- FP1 replaces only the crown. It works when bone and gum levels look natural.
- FP2 replaces the crown and part of the root structure to improve proportions.
- FP3 replaces teeth and missing gum tissue. It is common in full-arch implant restorations with bone loss.
If your patient has significant ridge resorption, an FP3 design often gives better lip support and smile balance. You must plan for prosthetic flange thickness, tooth position, and hygiene access.
You also decide between fixed implant-supported prostheses and removable options. Fixed restorations offer stability and strong chewing function. Removable designs may help when bone volume or budget limits the case.
Your choice affects implant number, angulation, and long-term maintenance. You always plan the final teeth first, then work backward to guide implant placement.
Virtual Implant Planning and Prosthetically Driven Workflows
You use digital dentistry to connect the surgical and restorative phases. A prosthetically driven workflow ensures the implants support the final tooth design, not the other way around.
With CBCT data and intraoral scans, you create a virtual setup. This lets you position implants based on ideal tooth position, bone anatomy, and occlusion.
Guided surgery improves accuracy during implant placement. Static guides or dynamic navigation help you control angulation and depth.
AI-powered full-arch implant planning shows how digital tools increase predictability and team communication.
You can also fabricate a provisional prosthesis in advance. This allows immediate loading in selected cases and shortens chair time.
Digital planning reduces guesswork. You see bone limits, sinus position, and nerve location before you ever pick up a handpiece.
Designing for Implant Depth and Bone Volume
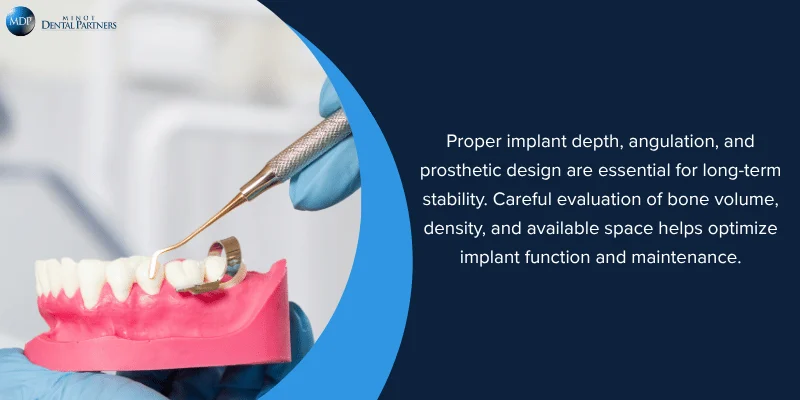
You must control implant depth and angulation to support long-term stability. Poor depth control can lead to weak emergence profiles or difficult hygiene access.
When bone volume is limited, you may tilt posterior implants to avoid the sinus or nerve. Many full-arch protocols use angled implants to maximize available bone.
You evaluate:
- Bone height and width
- Bone density
- Smile line and lip support
- Inter-arch space
Implant depth affects the transition line between prosthesis and tissue. If you place implants too shallow, metal may show. Too deep, and you risk tissue inflammation or difficult retrieval.
You design the prosthesis to distribute force evenly across implants. Proper spacing and parallelism improve screw access and reduce mechanical stress.
When you align implant depth, bone volume, and prosthetic design, you create a restoration that functions well and remains serviceable for years.
Guided Surgery and Modern Implant Placement Approaches
You plan full arch cases with digital tools, surgical guides, and precise implant placement methods.
ou also account for multi-unit abutments, All-on-X treatment design, and when bone reduction creates space for a strong, cleanable prosthesis.
Surgical Guides and 3D Printing
You start with a digital plan. You combine a surface scan with a CBCT scan and match the data to place each implant in the correct depth, angle, and position.
With guided systems, you transfer that plan to the mouth using surgical guides. These guides control the drill path and help you avoid nerves, sinuses, and thin bone areas.
A review on prosthetically driven planning explains how guided surgery supports accurate, restoration-focused implant placement and reduces positioning errors that can affect long-term health and hygiene.
You design the guide in software and print it with a 3D printer, often using SLA or DLP technology. Fit matters. Even small scan or print errors can shift implant position.
You also decide if the guide will be:
- Tooth-supported
- Mucosa-supported
- Bone-supported
Each type has limits. For example, mucosa-supported guides may need fixation pins to reduce movement during drilling.
Multi-Unit Abutments and All-on-X Protocols
After implant placement, you select multi-unit abutments to correct angulation and create a common path of insertion. These abutments sit on top of the implants and allow you to attach a screw-retained full arch prosthesis.
In an All-on-X approach, you typically place four to six implants. You often tilt the posterior implants to avoid the sinus or nerve while increasing anterior-posterior spread.
Key goals in All-on-X treatment:
- Achieve primary stability for immediate loading
- Create even load distribution across the arch
- Maintain space for hygiene under the prosthesis
Digital planning plays a major role in full-arch rehabilitation. Modern workflows outline how static guided surgery uses a printed stent, while dynamic systems track drills in real time.
You plan implant position around the final prosthesis, not the other way around.
Bone Reduction Considerations
In many full arch cases, you perform bone reduction before implant placement. You remove a measured amount of alveolar bone to create vertical space for:
- The prosthetic framework
- Acrylic or ceramic material
- Artificial teeth
- Hygiene access
Without enough space, the final prosthesis looks bulky and traps plaque.
You measure the reduction based on restorative needs, not guesswork. You consider lip support, smile line, and the thickness of the final prosthesis.
Bone reduction also helps you level uneven ridges. A flat platform improves guide seating and implant alignment, especially in All-on-X treatment.
When you plan bone reduction carefully, you improve prosthetic fit, long-term maintenance, and patient comfort.
Provisionalization, Immediate Loading, and Long-Term Success
Your dentist in Minot does not stop after placing implants. They plan how you will function right away, how your temporary teeth will protect healing tissues, and how your final implant restoration will last for years.
Immediate Loading Strategies
With immediate loading, your dentist places a temporary prosthesis on the implants within 24 hours of surgery. You leave with fixed teeth instead of waiting months without them.
This approach works only when implants have strong primary stability. Bone quality, implant position, and bite forces all matter. Dentists often use digital scans and guided surgery to control placement.
For full-arch implant restorations, the temporary bridge is usually screw-retained. It connects multiple implants to spread biting forces. You must follow a soft diet during early healing. That reduces stress while bone bonds to the implant surface.
Managing Implant-Supported Prostheses
Your temporary prosthesis is not just cosmetic. It shapes your gum tissue and guides how the final implant-supported prostheses will look and function.
Dentists adjust the bite to limit heavy contact in the first weeks. They also design the prosthesis to reduce cantilevers, which lowers strain on the implants.
You may receive either:
- A fixed full-arch bridge
- An implant-supported overdenture
Research on timing of prosthetic loading in dental implantology shows that both options can perform well when dentists follow proper protocols.
Your final implant restoration often uses stronger materials like zirconia or high-strength acrylic over a metal or titanium frame. The design depends on your bite force, bone support, and esthetic goals.
Maintenance and Follow-Up
Long-term success depends on maintenance. Implants do not decay, but the surrounding tissue can become inflamed if plaque builds up.
You will need:
- Deep teeth cleanings every 3–6 months
- X-rays to monitor bone levels
- Periodic screw tightening checks
Studies on primary stability and loading in dental implants highlight that stability at placement and controlled loading affect long-term outcomes. Still, daily care plays a major role.
Brush twice a day with a soft brush. Use floss designed for implant-supported prostheses or a water flosser to clean under the bridge.
When you follow instructions and attend regular visits, your full-arch implant restorations can stay stable and functional for many years.
Frequently Asked Questions
You want clear steps, real details, and honest answers before you commit to full-arch implants. Dentists rely on exams, scans, digital design, and careful planning to build a treatment plan that fits your mouth and your goals.
What information do you collect during the first consultation for full-arch implants?
Your dentist starts with your medical and dental history. They review medications, health conditions, past surgeries, and any gum disease or tooth loss.
They examine your gums, bite, jaw joints, and any remaining teeth. They also check how your lips move when you smile and talk.
You will discuss your goals. Some patients want fixed teeth that do not come out. Others may choose a removable option for easier cleaning.
Photos and digital scans often happen at this visit. These records help plan tooth position and smile design.
Which scans or images are needed to plan full-arch implant placement accurately?
A cone-beam CT scan (CBCT) plays a key role in planning. It shows your bone height, width, and important structures like nerves and sinuses.
Many dentists also take digital impressions with an intraoral scanner. This creates a 3D model of your mouth without messy materials.
When planning full-arch cases, dentists often combine digital scans with CBCT data to guide implant placement. Photographs and sometimes facial scans help match your new teeth to your face shape and smile line.
How do you decide how many implants are needed to support a full arch?
Your dentist looks at your bone quality, bone volume, and bite forces. They also consider whether you want fixed teeth or a removable overdenture.
Many full-arch cases use four to six implants per arch. If your bone is strong and well shaped, fewer implants may work. If your bone is softer or your bite forces are high, your dentist may recommend more implants for added support.
How do you check if I have enough bone, and what happens if I don’t?
The CBCT scan shows how much bone you have in three dimensions. Your dentist measures the height and width at each planned implant site.
If you do not have enough bone, you still have options. Your dentist may suggest bone grafting, sinus lifting, or placing angled implants to avoid thin areas.
In some cases, they reduce bone slightly to create space for the prosthesis. The exact plan depends on your anatomy and the type of restoration you choose.
What’s the process for designing my new teeth so they look natural and feel comfortable?
Your dentist first decides where the front teeth should sit. They look at your lip support, smile line, and how much tooth shows when you talk.
They create a digital or physical mock-up. You may try in a temporary set of teeth to test the shape, color, and bite.
During this phase, they adjust the vertical dimension, which is the space between your upper and lower jaws. They also check speech and comfort before finalizing the design.
How do you estimate the timeline and number of visits from planning to the final teeth?
Your timeline depends on your bone condition and whether you need grafting. Some patients receive implants and temporary teeth on the same day, while others heal for several months first.
A typical process includes a consultation, records appointment, surgery, and several follow-up visits. After healing, you return for impressions or scans for the final teeth.
Your dentist will map out each step so you know what to expect and how many visits to plan for.